AUDIOCUBE
Resources
Search...
⌘K
Tools
Motion Automator

Motion Automation is a suite of tools that animates the position of devices and sounds in Audiocube.
You can record movements by hand on the Timeline or apply ready-made motion patterns from the Motion Panel - no manual dragging required during playback.
What Motion Automation Does
Varies a device’s X, Y, Z coordinates over time.
Creates evolving sound stages and moving listener perspectives.
Works in real time; changes are audible the moment they are written or triggered.
Devices That Can Be Automated
Samplers - Main sound generating devices
Emitters - Physics-based sound generators
The Microphone - You can add motions to the external microphone, to create a moving listening position.
FX Zones (coming soon)
Choosing a Workflow
If you want to… | Use… | How it works |
|---|---|---|
Draw a custom movement with the mouse | Timeline | Enable recording, grab the device, move it - its path is captured frame-by-frame. |
Apply a pre-shaped, continuously running motion | Motion Panel | Select a path (circle, figure-8, etc.), set speed/radius, click Play. |
Build flexible, accurate paths | The Spline Editor | Enable spline mode, then create new nodes, and move them to build a path. |
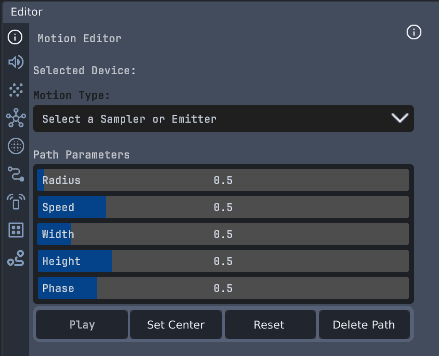
Motion Panel (Automatic Motions)
You can open the motion window on the right-side editor dock. This gives you access to the quick, automatic motions.
Control | Description |
|---|---|
Shape |
|
Radius | Overall size of the path on the horizontal plane |
Speed | Traversal rate along the path |
Width | Stretches the shape sideways |
Height | Adds vertical movement |
Phase | Starting offset on the path |
Motion Panel Buttons
Play / Stop – Start or halt motion playback.
Set Center – Use the device’s current position as the geometric centre of the path.
Reset – Return all motion parameters to default values.
Delete Path – Remove any manually recorded path data.
THE SPLINE PATH EDITOR
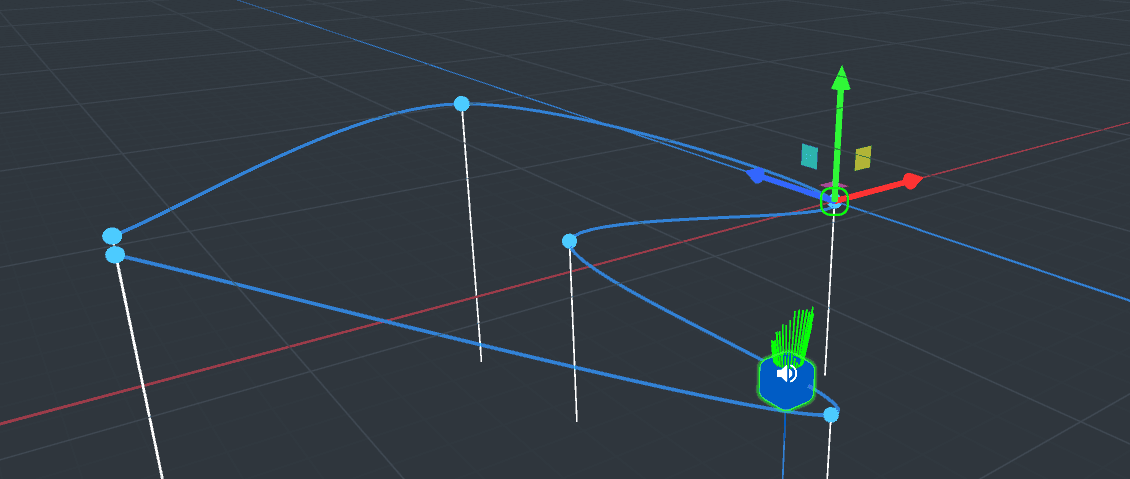
The spline system uses Catmull-Rom interpolation to create natural, curved paths. Unlike Bezier curves, the path always passes directly through every node, making it much more intuitive to shape in 3D space.
Enabling Spline Mode
Select a device with an Automator component.
Select Spline from the "Path Type" dropdown.
The system automatically creates an Initial Path of 3 nodes:
Node 0: Device current position (Beat 0).
Node 1: Forward + slightly right (Beat 4).
Node 2: Further forward (Beat 8).
Node Basics & Appearance
Nodes are the control points of your path. They dynamically scale so they remain visible at any zoom level.
Normal: Cyan/light blue sphere.
Selected: Yellow/gold (Nodes are added to the SelectionBox for gizmo support).
Hover: Bright cyan.
Path Line: Tapered (thick at the start, thin at the end) to show direction.
Mouse Interactions
Click + Drag: Move node in 3D space. Y-position is clamped (min 0.5) to prevent nodes from going below the floor.
Double-Click: Add a new node AFTER the clicked node.
If on the last node: Extends the path in the current direction.
If between nodes: Inserts at the midpoint position and beat time.
Triple-Click: Delete the node.
Drag-to-Delete: Drag a node until it overlaps an adjacent node. Both turn RED as a warning; release to delete.
Keyboard Shortcuts (Selection Required)
Delete / Backspace: Delete selected node(s).
Ctrl/Cmd + X: Cut (delete) selected node(s).
Ctrl/Cmd + D: Duplicate selected node(s). Creates copies offset by 1 unit in X/Z and offset by the default beat interval.
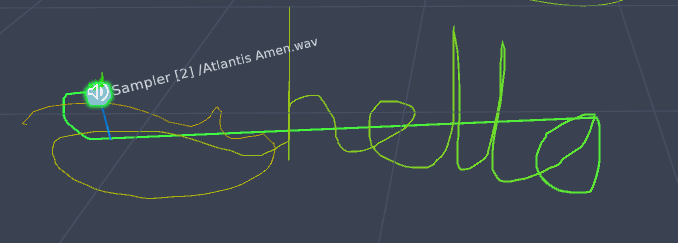
Recording Manual Motion (Timeline)

The sequencer can record spatial automation, enabling you to specify the placement of objects in the scene over time.
Open Sequencer ▶ Timeline.
Enable Automation and Record.
Start playback.
Grab the device and move it; its position is captured each frame.
Release the device to let it follow the recorded path.
Grab it again to overwrite the existing path.
Disable Record to lock the path; toggle Automation off to pause all movement.
Best-Practice Tips
Use
Manualmode for free-form gestures; use presets for rhythmic or geometric motion.Remember to Set Center after relocating a device, or the path may offset unexpectedly.
Keep Automation disabled while arranging the scene to avoid unintended recordings.